前回、あまったノートPCに、「CentOS8」をインストールしたので、このサイトのミラーサイトを作っておこうと思います
すぐ忘れるので、覚書として残しておきます
インストール後の設定
更新
# dnf update
selinuxを無効
# getenforce
Enforcing

# cd /etc/selinux/
# vi ./config
 SELINUX=enforcing
 ↓
 SELINUX=disabled

# reboot

# getenforce
Disabled
sudo権限ユーザーの作成
# useradd hogehoge
# passwd hogehoge
Changing password for user hogehoge
New Password:
Retype New Password:
Password: all authentication tokens updated successfully.

# usermod -G wheel hogehoge
# id hogehoge
uid=1001(hogehoge) gid=1001(hogehoge) groups=1001(hogehoge),10(wheel)
ssh
windowsからアクセスするには、「TeraTerm」を利用
「ダウンロード」⇒「リリース一覧」で、「exe」と「zip」が用意されている
teraterm-4.105.exe
teraterm-4.105.zip
ZIPはインストールする必要がなくて、展開したファイルを適当なフォルダへ
配置するだけで使用可能なので、私はZIPを選択
windows から、ttermpro.exe を実行すれば、「Use plain password to log in」でcentOS8PCへログイン。
centOS8側で、秘密鍵・公開鍵を作成し、公開鍵認証で接続するようにする
$ ssh-keygen -t ecdsa -b 521
Generating public/private ecdsa key pair.
Enter file in which to save the key (/home/hogehoge/.ssh/id_ecdsa):
Created directory '/home/hogehoge/.ssh'.
Enter passphrase (empty for no passphrase):
Enter same passphrase again:
Your identification has been saved in /home/hogehoge/.ssh/id_ecdsa.
Your public key has been saved in /home/hogehoge/.ssh/id_ecdsa.pub.
The key fingerprint is:
・
・
$ cd .ssh
$ ls
 id_ecdsa  id_ecdsa.pub
id_ecdsa が秘密鍵
id_ecdsa.pub が公開鍵
秘密鍵をアクセスしたい側にコピーし、公開鍵はされる側に保存する
公開鍵は、authorized_keys という名前で保存してパーミッションは600にする
$ cd ~
$ mkdir ./.ssh
$ chmod 700 ./ssh
$ chmod 600 id_ecdsa
$ chmod 600 id_ecdsa.pub
$ cat id_ecdsa.pub >> authorized_keys
$ chmod 600 authorized_keys
これでアクセスされる側の設定は完了
秘密鍵をアクセスしたい側へコピーする
teratermからアクセスしたいので、適当なホルダに保管する
teraterm のSCPコマンドを使い、「centOS8」側からコピーできる
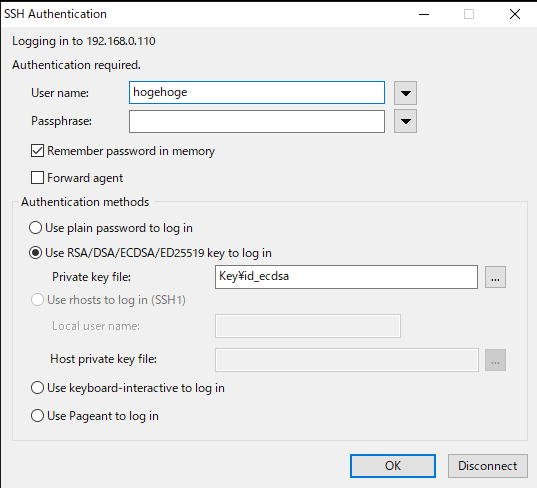
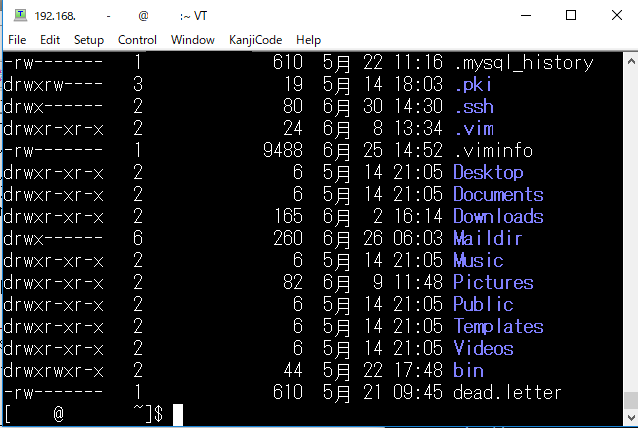
秘密鍵のコピーが完了したら、TeraTerm を起動し、「Use .. key to log in」で秘密鍵を指定してログイン出来る事を確認
確認できたら、セキュリティ向上対策も行う
ノートPCを 閉じても無視する設定
# cd /etc/systemd/
# cp -p logind.conf logind.conf.org
# vi /etc/systemd/logind.conf
 HandleLidSwitch=suspend
     ↓
   HandleLidSwitch=ignore
  ・
  ・
# systemctl restart systemd-logind
wwwサーバー
httpdインストール
$ sudo dnf -y install httpd httpd-tools mod_ssl
ファイヤーウォールに追加
$ sudo firewall-cmd --add-service=http
success
$ sudo firewall-cmd --runtime-to-permanent
success
httpポートを80番以外に使用する場合
$ sudo firewall-cmd --zone=public --add-port=8080/tcp --permanent
success
$ sudo firewall-cmd --reload
success
$ sudo firewall-cmd --list-all
public (active)
  ・
 services: cockpit dhcpv6-client http ssh
  ・
 ports: 8080/tcp
   ・
追加したルールの削除
$ sudo firewall-cmd --zone=public --remove-port=8080/tcp --permanent
https化
 $ dnf list installed | grep mod_ssl
$ sudo yum -y install mod_ssl  <---  登録されていなかったら
$ sudo httpd -M | grep ssl
  ssl_module (shared)
$ sudo firewall-cmd --add-service=https
success
  .
  .
 $ sudo firewall-cmd --runtime-to-permanent
success
$ sudo firewall-cmd --list-all
certbot のインストール
今回はStandaloneオプションを使ってみる
これは、webサーバーが動いていると取得できないので止めておく必要がある。
また、外部から80番ポートでこのサーバーにアクセスする設定にしておく
$ sudo dnf install epel-release
$ sudo dnf install certbot

$ systemctl stop httpd
$ certbot certonly --standalone -d www2.hogehoge.com
   Congratulations! <------------ が表示されればOK
SSLサーバ証明書の設定
「/etc/httpd/conf.d」内の「ssl.conf」を編集
$ cd /etc/httpd/conf.d
$ sudo cp -p ssl.conf ssl.conf.20200216
$ sudo vi ./ssl.conf
 ・
# SSLCertificateFile /etc/pki/tls/certs/localhost.crt
SSLCertificateFile /etc/letsencrypt/live/www2.hogehoge.com/cert.pem
 ・
 ・
# SSLCertificateKeyFile /etc/pki/tls/private/localhost.key
SSLCertificateKeyFile
/etc/letsencrypt/live/www2.hogehoge.com/privkey.pem
 ・
 ・
# SSLCertificateChainFile /etc/pki/tls/certs/server-chain.crt
SSLCertificateChainFile /etc/letsencrypt/live/www2.hogehoge.com/chain.pem

    確認は、「sudo」ではなく「su」で行う
 # httpd -t
Syntax OK
# systemctl restart httpd
# systemctl status httpd
バーチャルホスト設定
# cd /etc/httpd/conf.d/
# vi virtual-00.conf  <--  IPアドレスと初期ホスト名へのリクエストを禁止
<VirtualHost default:80>
     ServerName any
     <Location />
          Require all denied
     </Location>
 </VirtualHost>

# vi hogehoge.com.conf  <-- バーチャルホスト設定
##### VirtualHostSetting hogehoge.com ####
<VirtualHost *:80>
 ServerName server2.hogehoge.com
 ServerAlias www2.hogehoge.com
 ServerAdmin hoge@hogehoge.com
 DocumentRoot "/home/www/html/hogehoge.com"
 <Directory "/home/www/html/hogehoge.com">
     Options FollowSymLinks
     AllowOverride All
     Order deny,allow
     Allow from all
 </Directory>
 ErrorLog logs/hogehoge.com-error_log
 CustomLog logs/hogehoge.com-access_log combined
</VirtualHost>

<VirtualHost *:443>
 SSLEngine on
 ServerName server2.hogehoge.com
 DocumentRoot "/home/www/html/hogehoge.com"
 SSLCertificateFile /etc/letsencrypt/live/www2.hogehoge.com/fullchain.pem
 SSLCertificateKeyFile /etc/letsencrypt/live/www2.hogehoge.com/privkey.pem
 <Directory "/home/www/html/hogehoge.com">
     Options FollowSymLinks
     AllowOverride All
     Order deny,allow
     Allow from all
 </Directory>
 ErrorLog logs/hogehoge.com-error_log
 CustomLog logs/hogehoge.com-access_log combined
所有者の変更とテストページ作成
# cd /home/www/html/ <---- テストページ作成
# mkdir ./hogehoge.com
# cd ./hogehoge.com/
# vi ./index.html
 Test page for hogehoge.com html

# chown -R apache.apache hogehoge.com/ <--- 所有者変更
# httpd -t
Syntax OK
#systemctl restart https
#systemctl status httpd
ローカルからの確認
ローカルの、Windows10マシンから確認する場合には、「hosts」ファイルを編集する。
下記フォルダの中に、保存されている
C:\Windows\System32\drivers\etc
192.168.0.100 www2.hogehoge.com